
7 Steps for Cleaning Fabric Sofa

Key Highlights Understanding the type of fabric and its cleaning instructions is crucial for cleaning fabric sofa effectively. Reading the manufacturer’s cleaning guidelines is important to ensure that you don’t damage the fabric. Wet cleaning and dry cleaning are two common methods for cleaning fabric sofas, each with its own advantages and disadvantages. Removing spills and stains from a fabric sofa can be done using homemade cleaners or chemical cleaners, depending on the type of stain. Homemade cleaners, such as baking soda and vinegar solutions, can be effective in removing stains from fabric sofas. Special considerations should be taken for stubborn stains, such as pet stains, and the use of upholstery cleaners may be necessary. Following a 7-step process for cleaning a fabric sofa can help ensure a thorough and effective cleaning. Introduction Whether you’re a true ‘couch potato’ or not, most people spend a significant amount of time sitting on their fabric sofas. Over time, dirt, crumbs, and stains are bound to accumulate, making it important to know how to keep your fabric sofa clean. Not only does a clean sofa contribute to a healthier living environment, but it also helps maintain the overall appearance and longevity of the furniture. Cleaning a fabric sofa can seem like a daunting task, especially if you’re unsure of the proper cleaning methods and products to use. However, with the right knowledge and approach, you can easily clean your fabric sofa and restore its beauty. In this blog, we will guide you through the process of cleaning a fabric sofa, step by step. From understanding the type of fabric and its cleaning instructions to choosing the right cleaning method and tackling stubborn stains, we will cover everything you need to know to keep your fabric sofa looking and smelling fresh. Understanding Your Fabric Sofa’s Material Before you begin cleaning your fabric sofa, it’s important to understand the type of fabric it is made of and its specific cleaning instructions. Different fabrics require different cleaning methods and products to avoid any damage or discoloration. Fabric sofas can be made of various materials, such as cotton, linen, polyester, microfiber, or velvet. Each fabric has its own unique characteristics and cleaning requirements. To determine the type of fabric your sofa is made of, check the manufacturer’s tag or consult the sofa’s manual. The cleaning instructions provided by the manufacturer will guide you on what cleaning methods and products are safe to use on your fabric sofa. It’s important to follow these instructions to ensure that you clean your sofa effectively without causing any harm to the fabric. Identifying Fabric Types and Their Care Instructions Now that you understand the importance of knowing your fabric sofa’s material and cleaning instructions, let’s dive deeper into the different types of fabric and their care instructions. Cotton and linen are natural fabrics that are known for their durability and breathability. They can usually be safely cleaned with water-based upholstery cleaners. However, it’s important to check the manufacturer’s tag for any specific instructions. Polyester and microfiber are synthetic fabrics that are known for their stain resistance and easy maintenance. They can often be cleaned with water-based or solvent-based upholstery cleaners. Again, check the manufacturer’s tag for specific instructions. Velvet is a luxurious fabric that requires special care. It is best to use a velvet-specific upholstery cleaner or consult a professional for cleaning. Regardless of the type of fabric your sofa is made of, it’s always a good idea to spot test any cleaning product or method in an inconspicuous area before proceeding with cleaning the entire sofa. The Importance of Reading Manufacturer’s Cleaning Guidelines When it comes to cleaning your fabric sofa, one of the most important steps is to read and follow the manufacturer’s cleaning guidelines. These guidelines are specifically tailored to the fabric and construction of your sofa, ensuring that you clean it in the safest and most effective way possible. The manufacturer’s cleaning guidelines will provide you with information on the type of cleaning methods and products that are recommended for your fabric sofa. They may also include specific instructions on how to treat different types of stains or spills. By following the manufacturer’s cleaning guidelines, you can avoid using harsh or unsuitable cleaning products that could potentially damage the fabric or remove its color. It’s important to note that deviating from the recommended cleaning instructions may void any warranties or guarantees provided by the manufacturer. In summary, reading and adhering to the manufacturer’s cleaning guidelines is essential for maintaining the integrity and longevity of your fabric sofa. Wet cleaning vs dry cleaning fabric sofas When it comes to cleaning fabric sofas, there are two main methods: wet cleaning and dry cleaning. Both methods have their own advantages and considerations. Wet cleaning involves using water-based upholstery cleaners to remove dirt, stains, and odors from the fabric. This method is effective for general cleaning and removing water-based stains. However, it may not be suitable for fabrics that are sensitive to moisture or prone to water stains. Dry cleaning, on the other hand, involves using solvent-based upholstery cleaners to lift dirt and stains without the use of water. This method is ideal for fabrics that are not water-safe or prone to water damage. However, it’s important to note that dry cleaning may not be as effective in removing deep stains or odors. Ultimately, the choice between wet cleaning and dry cleaning depends on the type of fabric and the nature of the stains or dirt on your sofa. It’s always a good idea to refer to the manufacturer’s cleaning guidelines and consult a professional if you’re unsure which method is best for your fabric sofa. Removing spills or stains from a fabric sofa Accidents happen, and spills or stains on your fabric sofa are inevitable. The key is to act quickly and effectively to remove these spills or stains before they set in and become more difficult to remove. One of the most common and versatile cleaning solutions for
Quick Coffee Stain Removal Hacks for Carpets
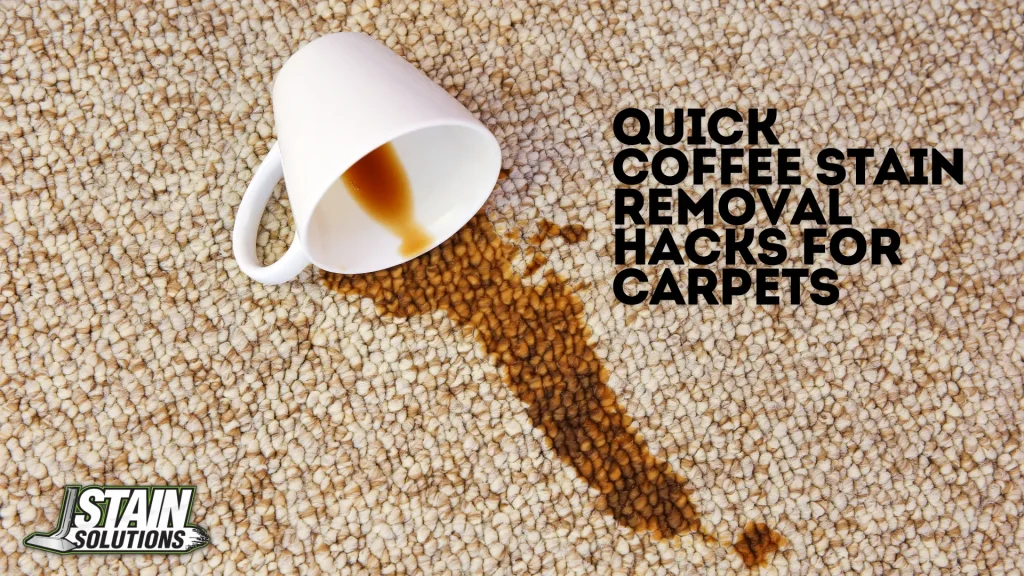
Key Highlights Coffee stains on carpets can be easily removed using common household items like vinegar, dish soap, and baking soda. Quick action is crucial when dealing with coffee stains, as this prevents them from setting in and becoming more difficult to remove. Blotting the stain and preparing the area for treatment are important pre-treatment steps for effective coffee stain removal. DIY solutions for fresh coffee stains include using a vinegar and water solution or a liquid dish soap and water mixture. Tough, old coffee stains can be tackled using baking soda and hydrogen peroxide, but it’s important to test them in an inconspicuous area first. Professional carpet cleaning solutions can be effective, but DIY methods using household items can also provide satisfactory results. Introduction Coffee stains on carpets can be a common yet stubborn issue to deal with. Understanding the science behind these stains and why quick action is essential is crucial. You can effectively tackle fresh coffee stains by following simple pre-treatment steps and utilizing DIY solutions like vinegar and water or liquid dish soap. Methods involving baking soda or hydrogen peroxide may be necessary for tougher, older stains. In this guide, we explore the best strategies for coffee stain removal in a few simple steps to keep your carpets looking fresh and clean. Understanding Coffee Stains on Carpets Coffee stains on carpets occur due to tannins in coffee, which bond with carpet fibers. Quick action prevents deep penetration. Fresh stains are easier to remove than old ones. Understanding the science behind these stains, including how to clean coffee stains, helps in effective removal. Time is of the essence, as delaying cleaning allows the stain to set, making removal harder. The Science Behind Coffee Stains Coffee stains on carpets involve complex chemical interactions. The tannins in coffee, responsible for its color, quickly bind with carpet fibers. The longer the coffee sits, the deeper it penetrates, making removal tougher. This process is accelerated by heat, which can set the stain. Understanding these reactions is key to effective removal strategies. Quick action prevents the coffee from bonding permanently with the carpet fibers, simplifying the cleaning process. Proper knowledge of the science behind these stains enhances the effectiveness of removal techniques. Why Quick Action is Crucial When a coffee spill occurs on your carpet, swift action is essential to prevent the stain from setting. Coffee contains tannins, which quickly adhere to carpet fibers, making removal more challenging over time. If left untreated, the stain can become stubborn and deeply ingrained, requiring more aggressive cleaning methods. By acting promptly, you can minimize the damage and increase the chances of successful coffee stain removal. Remember, the longer you wait, the harder it becomes to fully eliminate the stain. Pre-Treatment Steps for Coffee Stain Removal Blotting is the initial defense against coffee stains. Prepare the area by removing excess liquid and residue before applying any cleaning solution. Avoid rubbing the stain to prevent it from falling into the carpet fibers. By gently blotting and lifting the stain, you can effectively tackle fresh coffee spills. Conduct a patch test in an inconspicuous area before using any DIY solutions to ensure they won’t damage your carpet. This proactive approach sets the foundation for successful coffee stain removal. Blotting: The First Line of Defense Blotting is the initial crucial step in tackling a coffee stain on your carpet. It involves gently pressing a dry white cloth onto the stained area to absorb as much liquid as possible. Avoid rubbing, as this can push the coffee deeper into the carpet fibers, making it harder to extract. The goal is to lift the coffee off the carpet without spreading it further. Remember, quick and careful blotting sets the foundation for effective stain removal. Preparing the Area for Treatment Before starting the coffee stain removal process, preparing the area properly is essential. Begin by blotting the stained area with a dry white cloth to absorb as much liquid as possible. Then, mix a cleaning solution of liquid dish soap and warm water to gently dab onto the stain. Always work from the outside of the stain towards the center to prevent spreading. Test the solution on an inconspicuous area first to ensure it doesn’t damage the carpet fibers. Once you have your DIY carpet cleaner prepared, follow the next steps to effectively remove the coffee stain. DIY Solutions for Fresh Coffee Stains When dealing with fresh coffee stains on carpets, DIY solutions like carpet coffee stain remover DIY can be effective. A mixture of white vinegar and water can help break down the stain, while liquid dish soap combined with water can also be a solution. These homemade cleaning solutions are gentle on carpet fibers yet powerful enough to tackle the stains effectively. Applying and blotting these solutions on the stained area promptly can aid in removing the coffee stains before they set in, ensuring a cleaner carpet surface. Vinegar and Water Solution Mixing a tablespoon of white vinegar with two cups of warm water creates an effective DIY cleaning solution for coffee stains on carpeting. Vinegar’s acidity helps break down the stain while being gentle on the carpet fibers. After blotting the stained area, apply the vinegar and water solution, then blot again. Finally, rinse the area with cold water and pat it dry. This method can effectively remove fresh coffee stains and is a simple yet powerful hack for carpet cleaning. Liquid Dish Soap and Water For liquid dish soap and water, create a solution using a small amount of dish soap and warm water. Gently blot the carpet coffee spill with this mixture, ensuring that it does not saturate the carpet. Continue this process until the stain lightens. Then, use a damp cloth to rinse the area. Apply a little bit of the mixture at a time, blotting frequently with a dry cloth until the stain disappears. This mixture effectively breaks down coffee residue without damaging the carpet fibers. Proceed by blotting the area with a
Reliable Termite Inspection Gold Coast | Stain Solutions

Key Highlights Reliable termite inspections on the Gold Coast are crucial for homeowners to ensure peace of mind and prevent costly damage caused by termite infestations. Stain Solutions Gold Coast offers comprehensive termite inspection services using advanced technologies, such as thermal imaging and moisture meters. Their expert team of professionals is licensed and qualified to provide effective termite detection and management solutions for residential and commercial properties. The process of a professional termite inspection involves thorough inspections of all areas of the property, including roofs, subfloors, and internals, using specialized equipment. After the inspection, a detailed termite inspection report is provided, which includes recommended next steps and treatments for termite control and prevention. Stain Solutions Gold Coast also offers effective termite prevention techniques and maintenance tips to keep properties termite-free. Introduction Welcome to Stain Solutions Gold Coast, your reliable partner for termite inspections and pest management solutions. As homeowners, we understand the importance of maintaining a termite-free environment and protecting our properties from the damage caused by these unwanted pests. That’s why we offer comprehensive termite inspection and pest control services on the Gold Coast, using the latest technologies and techniques to ensure the highest level of accuracy and effectiveness. Our qualified exterminators at All Pest Solutions are here to help you safely remove a wide variety of pests, including rodents, silverfish, wasps, and spiders. At Stain Solutions Gold Coast, we take pride in our expert team of professionals who are licensed, qualified, and experienced in providing top-notch termite detection and management services. Whether you own a residential or commercial property, our team is dedicated to delivering exceptional results and ensuring your peace of mind. We understand that termite infestations can be a major cause of concern for homeowners. Not only can they cause significant damage to your property, but they can also be difficult to detect and eliminate without proper expertise. That’s why our termite inspections are designed to be thorough and comprehensive, covering all areas of your property, from roofs and subfloors to internals and externals. We utilize advanced technologies, such as thermal imaging and moisture meters, to identify any signs of termite activity and provide accurate reports for further action. In addition, we also offer pre-purchase pest inspections to ensure that your new home is free from any potential pest infestations. With Stain Solutions Gold Coast, you can trust that you’re in good hands. Our commitment to customer satisfaction and quality service sets us apart as a leading provider of termite inspections in Gold Coast, including Murwillumbah, Tweed Heads, Banora Point, Kingscliff, Tumbulgum, Ormeau, Upper Coomera, Oxenford, Nerang, Helensvale, Mudgeeraba, Ashmore, Southport, Runaway Bay, Surfers Paradise, Broadbeach, Burleigh Heads, West Burleigh, Palm Beach, Currumbin Waters, Tugun, Coolangatta, Robina, Varsity Lakes, Tallbudgera, Tamborine, Tambourine Mountain, Southport, Eagle Heights, and Canungra. We believe in delivering effective solutions that not only eradicate current termite problems but also prevent future infestations. Join the countless satisfied clients who have experienced the success of our termite inspection services and let us help you protect your property from the threat of termites. Contact us today for a free quote and take the first step towards a termite-free future. Understanding Termite Inspections on the Gold Coast When it comes to protecting Gold Coast homes from termite infestations, termite inspections are a crucial part of a proactive approach. Termite inspections involve a comprehensive assessment of your property to identify any signs of termite activity or potential risk factors. By understanding termite nesting and feeding habits, our experienced team can effectively detect and manage termites on the Gold Coast. As a trusted pest control company, Stain Solutions Gold Coast specializes in providing reliable and accurate termite inspections, ensuring the peace of mind of homeowners in the region, especially for those dealing with termites for the first time. Why Regular Termite Inspections Are Crucial Regular termite inspections are crucial for homeowners on the Gold Coast to maintain peace of mind and prevent costly termite infestations. By scheduling annual termite inspections, homeowners can stay ahead of any potential termite activity and take a proactive approach to termite control. These inspections allow for early detection of termite activity and enable homeowners to take immediate action to eliminate termites before they cause significant damage. By investing in regular termite inspections, homeowners can save themselves from expensive damage repairs and the stress of dealing with a termite infestation. It’s a small price to pay for the valuable peace of mind that comes with knowing your property is termite-free. Don’t wait for termites to invade your Gold Coast home. Schedule regular termite inspections with Stain Solutions Gold Coast and take a proactive step towards protecting your property. The Process of Professional Termite Inspection The process of a professional termite inspection involves a systematic approach to thoroughly inspecting all areas of your property for signs of termite activity. Our expert team at Stain Solutions Gold Coast follows a comprehensive protocol to ensure that no area is left unchecked. Using the latest technology, such as thermal imaging and moisture meters, our team can detect any signs of termite activity that may not be visible to the naked eye. These advanced tools allow us to identify hotspots and areas of high moisture that are indicative of termite infestations. During the inspection, our team will inspect the roof void, subfloor, internals, and externals of your property. We will use a timber sounding device to detect any abnormalities in timber that may be a result of termite activity. A moisture meter will help us identify areas conducive to termite activity. After the inspection, we will compile a digital photographic termite inspection report, which includes recommendations on how to reduce the risk of termite attack and a termite management plan if required. This report will be sent to you on the same day for your reference. By following this process, we ensure that every termite inspection is thorough, accurate, and provides you with the information you need to take the necessary steps for termite control and prevention. Stain